SVG filmstrips and flipbooks
Filmstrips
Slots consisted of three animated filmstrips, with a mask showing the visible area. A PHP script dynamically generated random offsets which moved each of the strips vertically by a set amount. This gives you a unique spin every time. We knew from our SVG slider test that you could incorporate raster images into an SVG layout, so we more or less switched the vector assets for raster, adjusted the animation and we had 'video'.
Just like slots the interaction and animation is driven by SMIL, and we’re using inline SVG with an external image reference. The filmstrip is a single image made up of multiple strips, embedded into the SVG. There’s one SMIL keyframe for each frame of video, so hand-coding is slow going and prone to error. If you want to make adjustments to say the frame rate, you need to update the whole thing manually. After doing a couple by hand Graeme wrote a tool. You plug in the resolution, number of strips, frame rate, whether to read from the top or bottom and it spits out the SMIL keyframes saving you the bulk of the work.
A 3.5 sec. animation contains ~ 53 frames at 15 fps. File-size-wise you’ll want to juggle resolution, length of clip, image compression, frame rate, etc. We used .jpg for our tests as they're more efficient than Gifs and better quality, but you can use whatever image format you like, or stick with vector artwork.

We added the option of multiple strips side-by-side, above we're using four
Filmstrip examples
- 3.5 second, 1480×644, 7.25MB
- 10.4 second, 352×160px, 974KB
- 10.4 second, 352×160px, 974KB
- 28.8 second 512×304, 10.2MB
- 38.4 second 512×304, 3.8MB
- 28.8 second 480×204x, 10.0MB
- 28.8 second 480×204, 10.0MBB
- Slots game 2017, rebuilt in '18
Sample raster filmstrip code
/* Example code for a 3.5 sec SVG/SMIL filmstrip animation */

<svg xmlns="http://www.w3.org/2000/svg" xmlns:link="http://www.w3.org/1999/xlink"/* define SVG parameters */>
<defs> /* viewport is size of a frame with mask as backup */

<clipPath id="clipPath">

<rect id="clip" x="100" y="0" width="1280" height="544" />

</clipPath>

</defs>
<defs> /* defining an image object to use later */

<g id="filmstrip">

<image x="0" y="0" width="1280" height="29376" xlink:href="filmstrip.jpg" />

</g>

</defs>
<g id="main-viewport"> /* group containing keyframe data */

<g style="clip-path: url(#clipPath);">

<use xlink:href="#filmstrip" x="100" y="-28832">

/* first keyframe set y position at this time */

<set attributeName="y" attributeType="XML" to="-28288" begin="sr01.click+0.066666666666667s" fill="freeze"/>
/* next two keyframes update y position at this time */

<set attributeName="y" attributeType="XML" to="-27744" begin="sr01.click+0.13333333333333s" fill="freeze"/>

<set attributeName="y" attributeType="XML" to="-27200" begin="sr01.click+0.2s" fill="freeze"/>
/* ... additional keyframe definitions go here... */
/* final keyframe */

<set attributeName="y" attributeType="XML" to="0" begin="sr01.click+3.5333333333333s" fill="freeze"/>

</use>

</g>

</g>
/* play button (circle and triangle) */


<g id="control">

<polygon points="730,246 760,266 730,286" fill="#d0d0d0" stroke="none" style="fill-opacity:0.75;">

<set attributeName="points" attributeType="XML" to="730,2046 760,2066 730,2086" begin="sr01.click" fill="freeze"/>

<set attributeName="points" attributeType="XML" to="730,246 760,266 730,286" begin="sr01.click+4.1s" fill="freeze"/>

</polygon> /* end of polygon that draws a triangle */
/* click circle with id ‘sr01’ that triggers an event which is then used to animate the image (click + a time = trigger for each keyframe) */


<circle id="sr01" cx="740" cy="266" r="40" stroke="#d0d0d0" stroke-width="6" style="fill:#d0d0d0;fill-opacity:0.0;stroke-opacity:0.75;cursor:pointer">

<set attributeName="cy" attributeType="XML" to="2066" begin="click" fill="freeze"/>

<set attributeName="cy" attributeType="XML" to="266" begin="click+4.1s" fill="freeze"/>

</circle>

</g>
Flipbooks
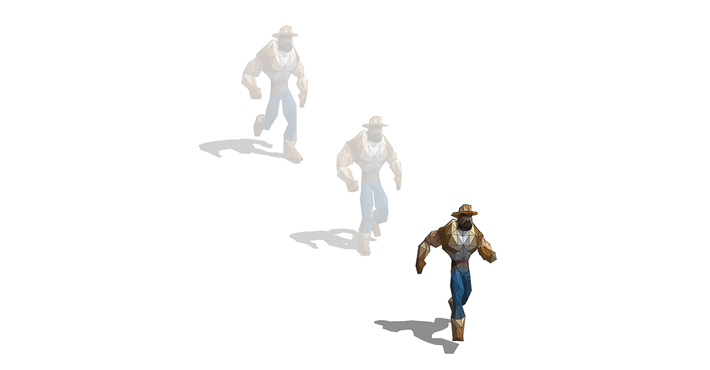
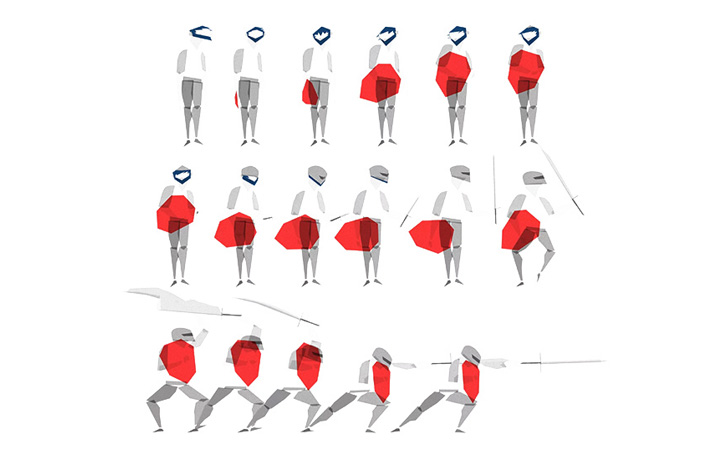
We originally went with a filmstrip as that’s how slots was configured, but you could use individual frames instead. Jonathan Ingram shared an SVG / SMIL flipbook back in 2012 for issue 17 of the Bifter. I also remember being inspired by Playground Inc’s vector animations from ~2014. We shared a few vector flipbooks as part of a 3D to SVG tool write up that same year. Our flipbooks were created by exporting a series of vector assets from a run cycle. We then turned each SVG model on and off, using SMIL to set the keyframe timing.
One downside of the flipbook technique is you end up with more code and HTTP requests. Instead of bringing in one filmstrip you need to request multiple images and they’re all listed in the code. If using raster images it would be inline — which would count towards Gmails ~100 K limit — but you can externally reference the frames if using SVG. It’s not so bad for a 14 frame run cycle like 'lumberjack' below, but with a video clip the frame count would start to climb.
Vector flipbook showing 3 of a 14 frame run cycle each pose turned on and off
Flipbook examples
- Raster image flipbook, 1.3 second clip
- Man in hat flipbook vector artwork, 740KB
- Lumberjack run flipbook vector artwork, 590KB
Playground Inc’s vector animations (image courtesy of Playground Inc.)
Sample vector flipbook code
/* Example code for SMIL flipbook using SVG artwork */

<svg version="1.1" id="svglayer" xmlns="http://www w3.org/2000/svg" xmlns:xlink="http://www.w3.org/1999/xlink"
viewBox="0 0 800 600" x="0px" y="0px" width="800px" height="600px" xml:space="preserve" /* define SVG parameters */ >
/* define SVG group for frame one, model pose one */

<g stroke-width="1" stroke-miterlimit="1">

<animate

id="frame1"

attributeName="display"

/* 14 values corresponding to the 14 SVG polygon models in the run cycle. inline = visible and none = not visible */

values="inline;none;none;none;none;none;none;none;none;none;none;none;none;none"
/* 14 keyframes for the 14 SVG models, values between 0-1 as proportion of animation duration */

key Times="0;0.076;0.152;0.228;0.304;0.38;0.456;0.532;0.608;0. 684;0.76;0.836;0.912;1"

dur="1s"

begin="0s"

repeatCount="indefinite" />
/* Polygon model data for first of the 14 poses */

<polygon fill="#39210b" stroke="#39210b" points="454.3,386.5 440.7,387.2 434.8,388.9" />

/* ... additional polygon data goes here

...  */

<polygon fill="#474318" stroke="#474318" points="407.0,224.9 408.9,212.8 394.7,224.0" />

</g> /* end of polygon data for first model pose */
/* repeat for the second model pose (frame 2) */

<g fill="#000000" stroke="#000000" stroke-width="1" stroke-miterlimit="1" opacity="0.4" filter="url(#s-blur)">
<animate

id="frame2s"

attributeName="display"
/* note how ‘inline’ is now second in the list as model two is now visible and model one is ‘none’ or not visible */

values="none;inline;none;none;none;none;none;none;none;none;none;none;none;none"
/* Same 14 keyframe timings as easy to keep track of */

key Times="0;0.076;0.152;0.228;0.304;0.38;0.456;0.532;0.608;0.684;0.76;0.836;0.912;1"

dur="1s"

begin="0s"

repeatCount="indefinite" />
/* Polygon model data for second of the 14 poses */

<polygon fill="#1e1306" stroke="#1e1306" points="461.1,434.5 438.1,416.6 445.3,436.7" />

/* ... additional polygon data goes here

...  */

<polygon fill="#474218" stroke="#474218" points="394.3,230.0 394.2,217.3 379.8,227.7" />

</g> /* end of polygon data for second frame pose */
/* repeat for the remaining 12 frames or poses, adjusting ‘none’ and ‘inline’ values to turn them on and off */
<polygon fill="#31261f" stroke="#31261f" points="388.9,200.3 388.3,198.3 378.4,191.5" />

</g></svg> /* end of last model (frame 14) close SVG */
Replace SVG with raster image url
As with filmstrips you can replace vector assets with raster images and use the same code for 'video'. This example is a 1.3 sec video sequence, containing 20 frames at ~15 fps. Single frames are less complicated as there’s no need to calculate filmstrip offsets, just the keyframe timing. It really only needs three per frame for off/on/off, so it's easier to keep track of.
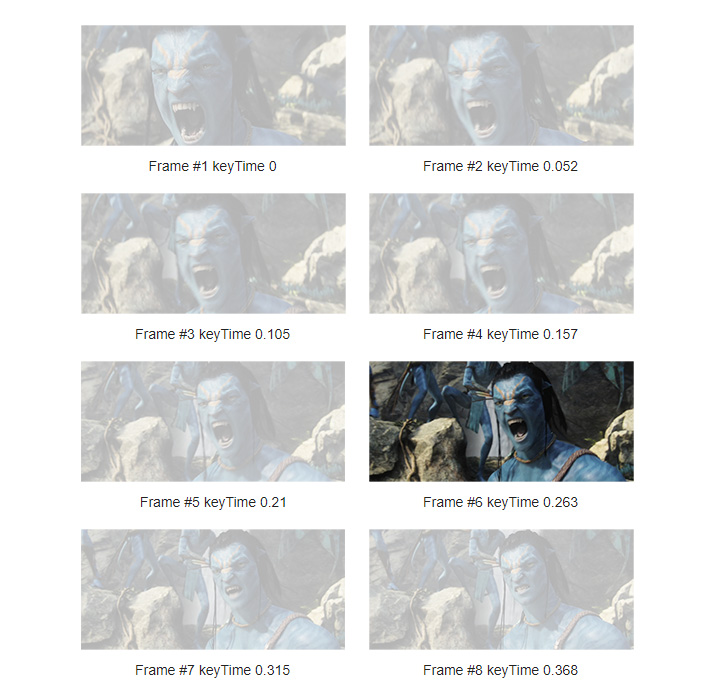
8 of 20 jpeg frames turned on & off at different keyTimes that fall between 0 –1
/* replace SVG polygon model data with an image url */

<g>

<animate

id="frame1"

attributeName="display"

values="inline;none;none;none;none;none;none;none;none;none;none;none;none;none;none;none;none;none;none;none"

/* values between 0-1 as proportion of animation duration */

keyTimes="0;0.052;0.105;0.157;0.21;0.263;0.315;0.368;0.421;0.473;0.526;0.578;0.631;0.684;0.736;0.789;0.842;0.894;0.94;1"

dur="1.333s"

begin="0s"

repeatCount="indefinite" />

<image x="0" y="0" width="480" height="204" xlink:href="av/av1197.jpg"/>

</g>
Controls
With a filmstrip a click triggers an event, and the event drives the animation. Whereas a flipbook contains a series of keyTimes which drives the animation. You could use ‘ begin ’ to control a flipbook animation via a click event, but it’s not something we’ve looked into thoroughly. For now our filmstrips have controls and the flipbooks loop indefinitely. Autoplay is not ideal for accessibility, though you could add prefers-reduced-motion to this solution.
Another consideration with SMIL is it’s one button per event so it only plays once reliably. If you want to press play multiple times without refreshing the page, I'd recommend layering up the buttons. For example SVG slots has five identical buttons, one for each spin. All of the filmstrip tests have just the one button — I've pressed them multiple times and its been fine — but if you were to use this in production I’d add a couple more to be safe.
Creative
The most interesting aspect for me is the creative possibilities being part of an SVG brings. You can incorporate your ‘video’ into elaborate layouts. As SVG / SMIL has many useful features like clip path, filters, overlapping live text, responsive design, interaction and spline animation. Though realistically we'll most likely stick with Gifs, as SVG email support isn't really encouraging. Probably one for the R&D folder, or the web.
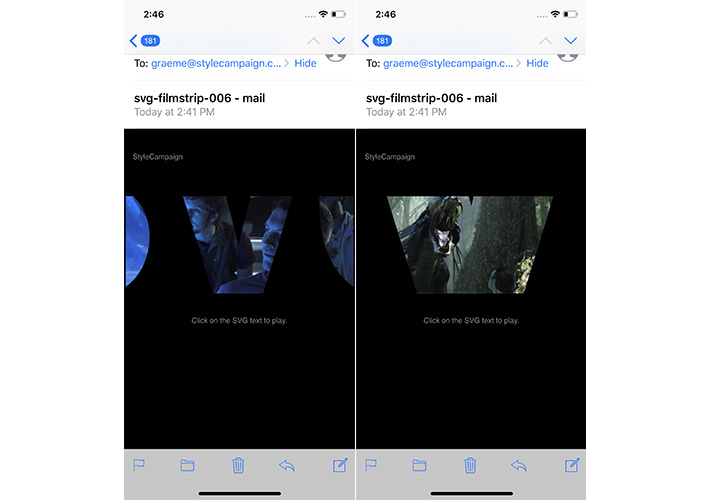
This test has the video playing with an animated clip-path overlaid