10 Etsy sellers share jewelry photography tips
1. Elizabeth Williams Jewelry: {view site}
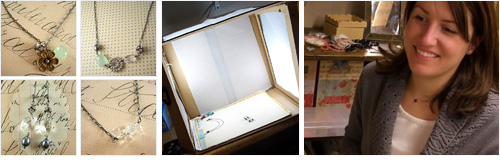
Beth Williams:
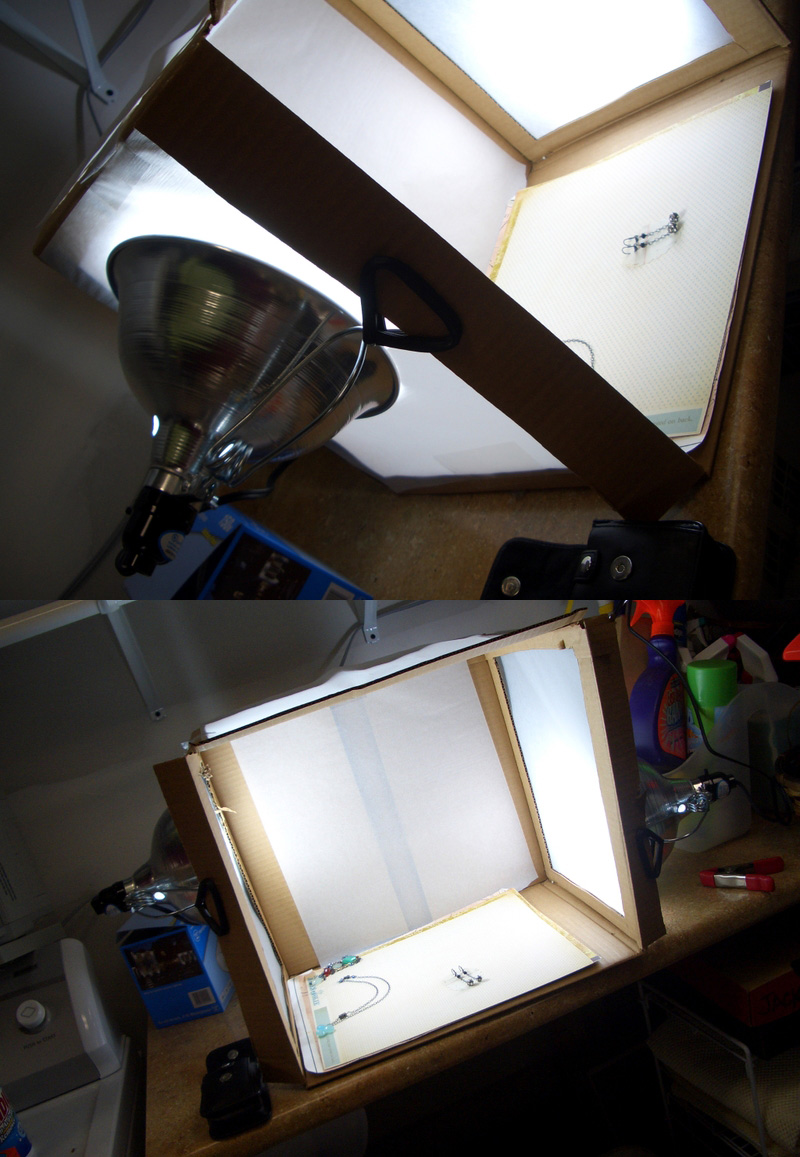
1) During the long cold winter months in Iowa, light is at a premium. I built a basic light box so that I could take photos at any time of day. I used a cardboard box and some tracing paper. See a photo here and read Beth's blog here.
2) Etsy also has fantastic resource articles for photographing your merchandise. I love these two videos and found them very helpful when I was starting out.
3) Another tip if your photos are too dark is to adjust the EV Shift, get to know your camera. I take a lot of photos. Digital makes it easy and doesn't cost anything to delete poor photos from your memory card. Good luck and have fun.
2. Sasha Bell Jewelry: {view site}
Sasha Bell:
1) I always take my photos outside on bright cloudy days or at dusk for a clear white and diffuse light.
2) I have my camera on a manual macro setting (usually has a little flower icon).
3) I also make sure to photograph from an angle to give maximum perspective and detail.
4) Don't forget to touch up your photos in a basic computer program.
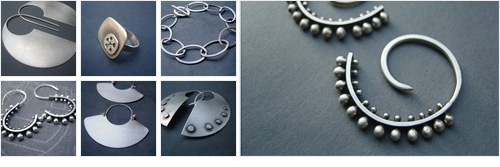
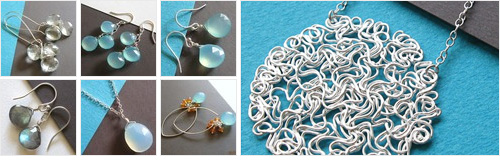
3. Hapa {view site}
Monica Barnhart Nachbar:
1) Use or make your own lightbox. If you don't have a lightbox....Use filtered morning light through a sheer drape. During mid-day summer sun, you can actually take photos in the shade using a longer exposure time.
2) Sometimes you can purchase an old macro lens in good working order from a local photography club's equipment swapmeet.
3) Use a tripod and a remote or a timer for the shutter. If jewelry has a highly polished finish, try to minimize the reflections showing you, your surroundings or the camera.
4. SeaUnicorn: {view site}
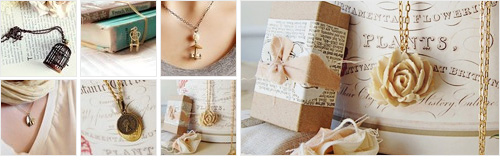
Jacqleen:
1) I always use mid day lighting for all my photos. They seem to come out the best when its around 2:00 on a sunny day, in indoors light.
2) Create a mood and atmosphere. Backgrounds I love to use are: old vintage books, music note sheets, hat boxes crystal knobs, vintage mirrors, roses, vintage furniture, cream colored mugs and even plates.
3) A lot of time I throw boxes in the shots, so you can see how it comes packaged.
4) I take many of my pieces on myself to provide a better look at how it actually looks when worn.
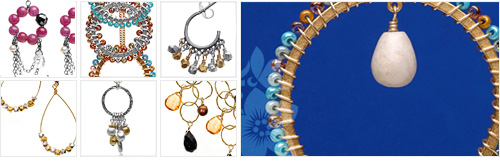
5. Kristin Perkins Glass Jewelry: {view site}
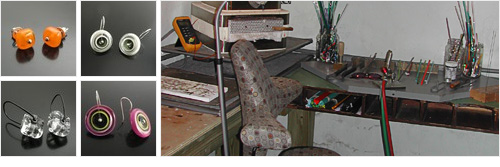
Photographer Sylvus Tarn of rejiquar works takes Kristin's photos:
1) A light cube. I was initially dubious, but now I'm totally sold on these foldable cubes with white translucent fabric stretched over them.
2) The lights that come with the light cube are useless; discard them and substitute a 500w tungsten photoflood mounted on a lightstand. You must set your camera's white balance, of course.
3) Use a mirror or white card to bounce extra light into areas that are too dark; and extra diffusion (e.g. plastic panels, as from fluorescent lighting panels) between the light and the cube if you're still getting specular highlights (hotspots).
With these three sets of tools you can light just about any jewelry effectively.
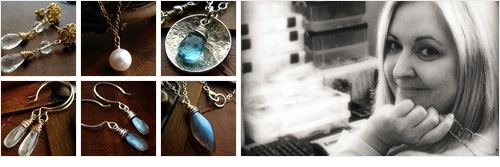
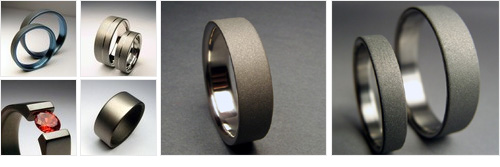
6. RockAndGold {view site}
Kathryn McAllister Coursolle:
1) Natural lighting works wonders. It doesn't give off the yellowish tint from bulb lighting. Take your photography in a place with bright diffused natural lighting. Direct sunlight is a little too harsh, but a thin curtain still allows for bright light to come through.
2) Study the settings on your camera. You don't need a new or expensive camera to take great shots, but you do need to get to know your macro button. It often looks like a small flower symbol and it is best when taking close ups of jewelry or fine detail.
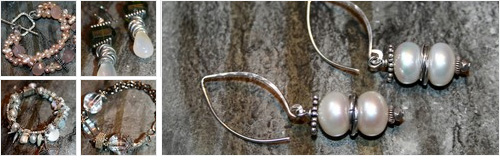
7. MsBelle {view site}
Ginger Wagner:
1) In shooting my jewelry, I use indirect natural light coming through a window with the blinds lowered, filtering the light.
2) It often helps to put a white piece of paper just outside camera shot to act as a reflector, bouncing light back on to the subject.
3) Also, wearing a white shirt can help reflect light back on to the subject.
8.Unleashed Jewelry: {view site}
Mollie Carey:
1) I use a good camera and take my pictures under a window that gets some direct light. You can also create a box with walls to keep too much light out.
2) I play with different backgrounds, now using an antiqued black concrete, white is too harsh for me. I like the softer black or a creamy white stone, this gives a natural effect.
3) I LOVE the software package PICASA, which is a free download and you can crop, rotate, change lighting, contrast... it helps tremendously!
9. Eninaj Design {view site}
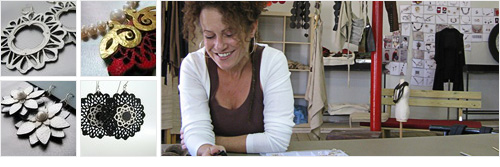
Janine Golbert:
1) I always try to think which background goes best with the materials used in my jewelery. They can be from nature like sand, grass, rock, wood or just a simple nice textured paper or fabric. Neutral backgrounds, or backgrounds with some light texture but that let the item be the star.
2) Concentrate on detail, select an interesting angle.
3) For earrings, position them in way they "talk to each other" not just side by side.
4) It is very important the way you cut your picture showing a special detail but not uncovering the whole piece to create curiosity.
10. ZoeAndDoyle {view site}
Theresa:
1) One of the difficulties of selling a unique handmade good online, is that your customer usually has no real-life comparison. So I try to take pictures that are on a neutral background, close-up, taken under different lighting conditions and capture the object from multiple angles.
2) I can't always include all the pictures I have of each item in the listings, but I keep them on-hand to send to people who would like to see additional pictures or have additional questions about my items.
10.5 Style Campaign
Anna Yeaman:
Ok so I'm an Etsy buyer, but I wanted in on the fun :)
1) My jewelry photo tip is a wire hanger: {view photo} It allows me to photograph necklaces and earrings so they appear suspended in space.
2) First straighten it out, then using pillars bend it into shape. I place small hooks at the ends and anchor it at the back if the jewelry is heavy.
3) I tie fishing wire around the hooks at the top, which I hang earrings off. The fishing wire allows me to adjust the width of the hanger, giving me control of the necklace chain width.
If you have a jewelry photo tip, share your ideas below or on Twitter. Be sure to include a link to your Etsy store or site.